
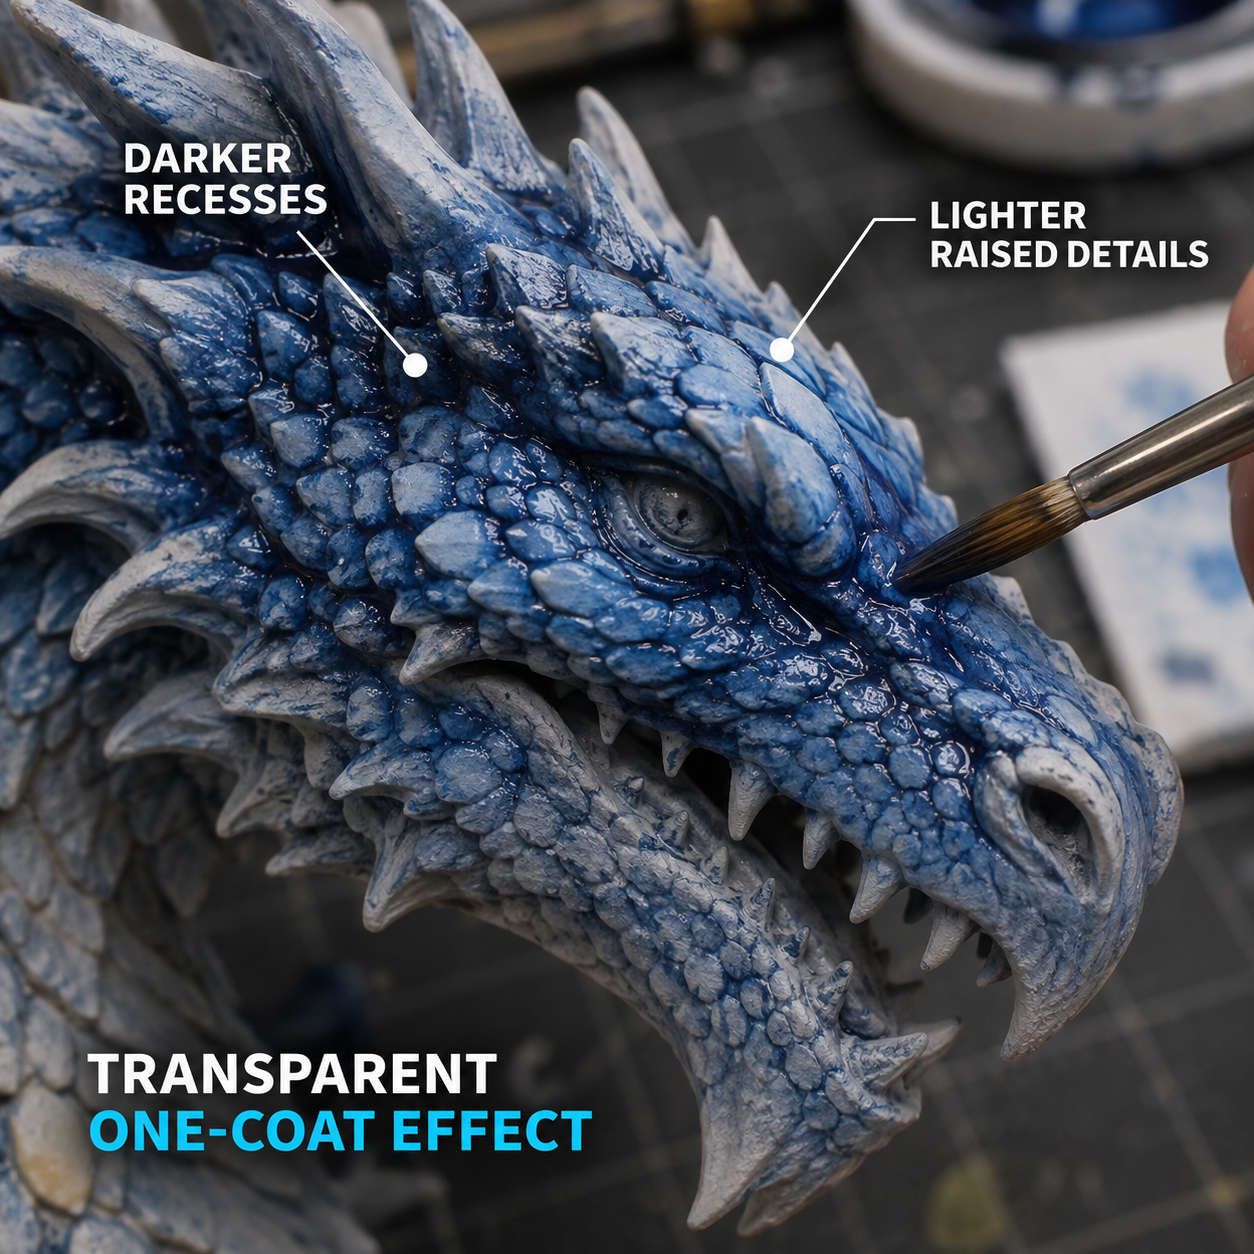
Want shadows and highlights to read clearly without painting every recess by hand? POP ART Flow Shade is a transparent, brush-applied acrylic designed to settle into sculpted details over a light base. This guide shows you how to control the paint on a miniature, model, or primed 3D print—and what to do when it pools.
What you need
- A clean miniature or model with a fully cured white, off-white, or light-grey primer or base coat
- A medium brush with a good point, plus a clean spare brush
- Water, a palette, and a cloth or paper towel
- A shade from the POP ART Professional Flow Shade 12-color set, or a single shade such as Marine Blue Flow Shade
Before you start: Choose a test area underneath the model. Transparent color changes noticeably with the base color and surface texture; a dark base will not give the same bright contrast as a light one.
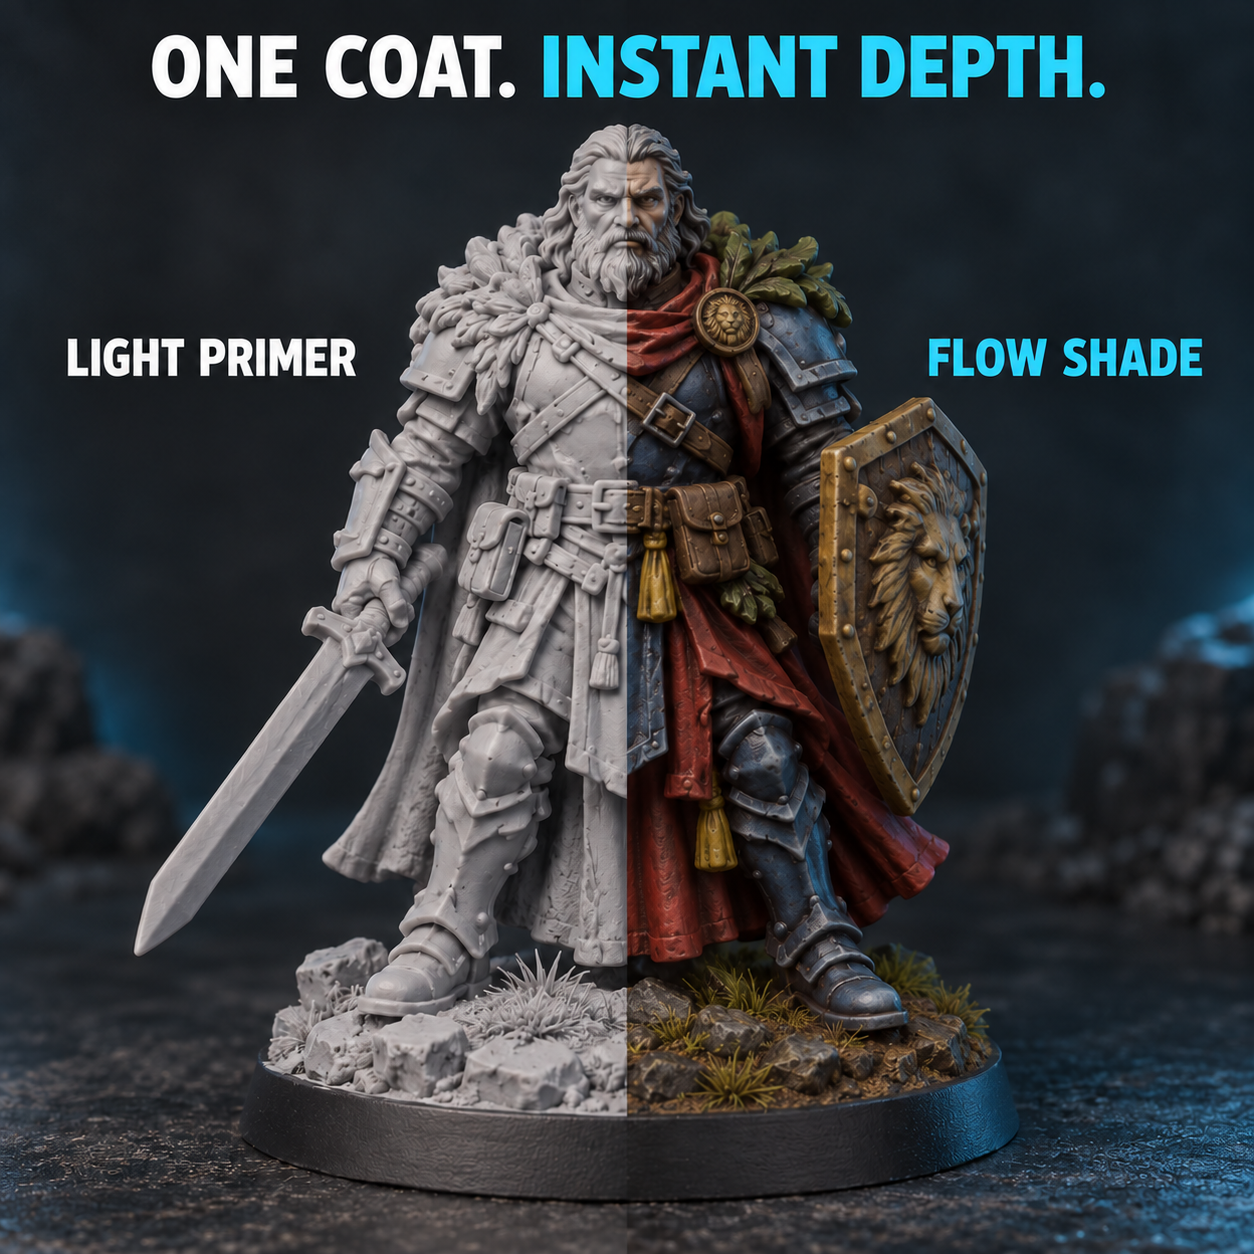
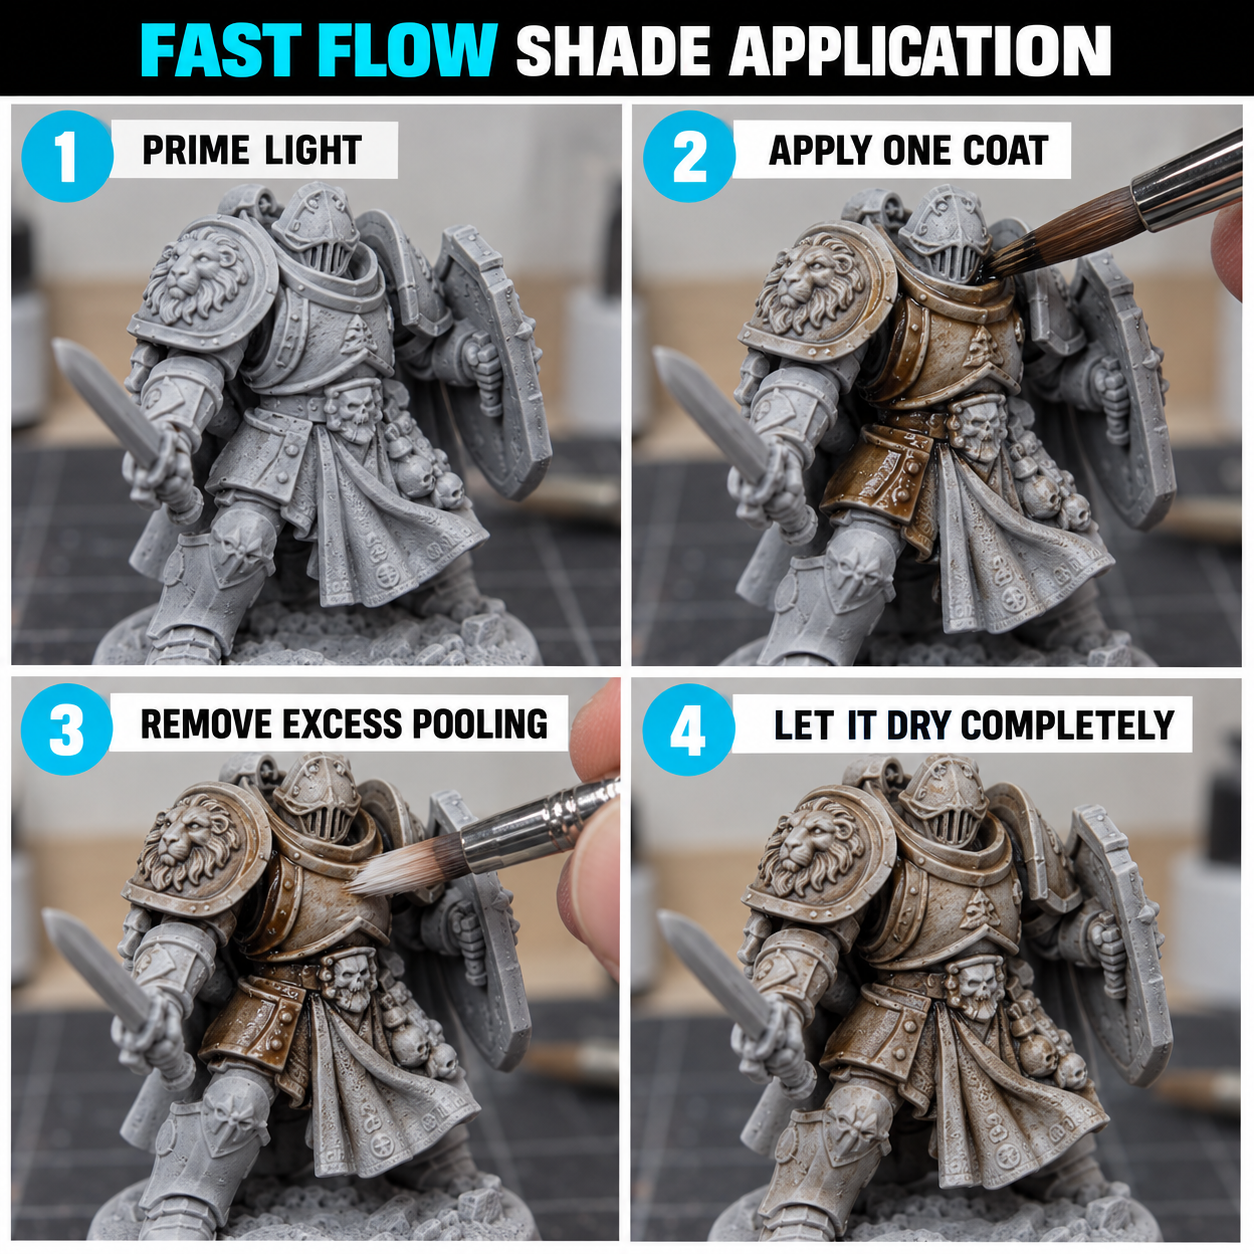
Apply Flow Shade in six steps
- Prepare the surface. Remove dust and loose residue. Let primer or your light base coat cure fully according to its own instructions. For a 3D print, clean and prepare the print as its material requires before priming.
- Shake the bottle. Dispense a small amount onto a palette. Start with the paint as supplied; test any adjustment on a spare piece before working on the model.
- Work one section at a time. Load the brush enough to cover an armor panel, fold of cloth, or other small area. Move the color across the surface and guide it into the sculpted recesses.
- Control the pooling. Watch flat areas and the lowest points. If a large puddle forms, touch it with the tip of a clean, slightly damp brush and wipe the excess away. Avoid scrubbing areas that have begun to set.
- Leave the coat alone to dry. Finish the section, then let it dry completely before touching it again or adding another layer. Repeatedly brushing partly dry paint can leave tide marks and uneven patches.
- Refine the details. Once dry, assess it in good light. Add another controlled coat where you want a deeper shadow, or restore a raised edge with an appropriate lighter paint. Test before applying any final varnish, and follow that varnish’s label for curing and ventilation.
Fix common Flow Shade problems
- Dark blotches on a flat panel: Too much paint collected in one place. Wick away excess while wet; on the next section use a smaller load and move the model to inspect hidden puddles.
- Weak contrast: The base may be too dark, or the surface too smooth to produce deep recesses. Test over a lighter base and use a second coat only after the first has dried.
- Streaks or tide marks: Avoid going back over an area as it dries. Cover smaller sections and complete each one in a single pass where possible.
- Lost fine detail: Check for heavy primer or accumulated paint layers. Use thin, controlled application and remove wet pools before they dry.
Choose your next project
Use one shade for a quick test on a textured cloak or armor plate, then move to the 12-color set for a broader starter palette. The 36-color set offers more choices for varied projects. For brush handling fundamentals, see our brush-control tutorial.
Cleanup and safe handling
Rinse brushes with water promptly after using the water-based acrylic; reshape the bristles and let them dry. Keep paint away from food and drinks, avoid getting it in eyes or mouth, and follow the product label and the primer or varnish manufacturer’s safety guidance. If sanding a print or spraying a separate primer or varnish, use the ventilation and protective equipment specified for that process.
Have a finished miniature you would like POP ART to feature? Visit the tutorials and community hub to share your work for review. Customer submissions are shown only after approval.
 AR
AR  EN
EN